Overview
Virtual Private Networking (VPN) software creates a secure, encrypted connection between your off-campus computer and the campus network. Affiliates of InCHIP can use VPN software to connect securely to the campus network from off-campus. This software, called Junos Pulse, must be downloaded to your computer, installed and configured. To connect using the full VPN client, download it below, install and configure it as directed.
1. Download Client
Apple OS X: Junos Pulse Client 5.0
2. Install Client
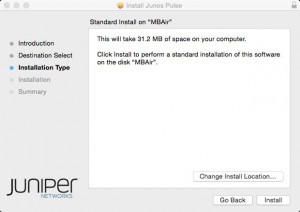
- Double click on the download and then the package icon

- Click “Continue”

- Click “Install”
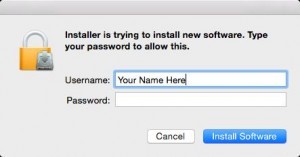
- You will be prompted for user credentials. This would be the user name and password with the ability to install software on this Mac. If you are unsure please contact InCHIP IT
- Click “Close”

3. Configure Client
- Click on the Junos icon on the title bar and then click “Open Junos Pulse”

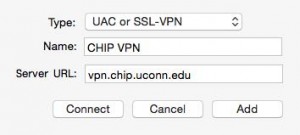
- Click on the “+” symbol at the bottom of the window

- Enter in the values shown below and click “Add”
- Close the window.
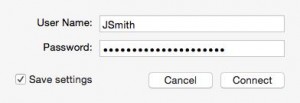
- Click on the Junos Client icon on the title bar and mouse over “CHIP VPN” and select “Connect”
- You will be prompted to enter your InCHIP ID [usually First Initial, Last Name] and password. To save this step in the future you may select “Save Settings”. To have increased security, do not check “Save settings” and you will be prompted each time you connect.
- To disconnect from the VPN, click on the Junos Client icon on the title bar and mouse over “CHIP VPN” and select “Disconnect”